Back in the day, plenty of office workers kept both a printer and a scanner on the desk next to the computer because sometimes you had to reproduce documents as well as create them. These days, that second piece of hardware is unnecessary — if you have an iPhone, iPad, or iPod Touch. The ability to produce professional-looking scans with your iPhone on-the-go can be accomplished with minimal setup — and you don’t even have to buy or install a special scanning app. It all works with the native apps on your device. We’ll show you several ways to do it.
Use the Files app
With iOS 13, scanning documents via your phone and placing the scans in a convenient location is easy, thanks to the iPhone’s Files app. You can scan receipts or sign documents and scan them immediately without having to take a paper copy home to do the job. You want to make sure you are connected to iCloud and can access your iCloud Drive from both your device and your desktop. Here’s how to get started.
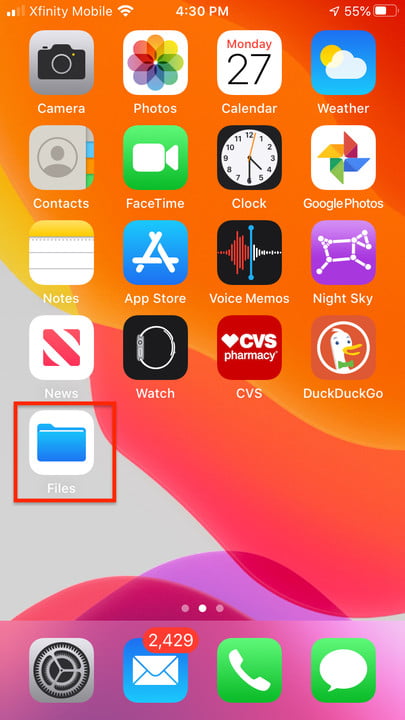
Locate the Files app on your phone. That’s where you can view all of your iCloud files, the same as on your Mac, so you don’t have to do the document shuffle.
Create a special folder for your scans if you want them all in one place.
From your Scan folder, swipe down from the top slightly until you can see the three-dot icon at the top left.
Tap the three-dot icon, then tap Scan Documents to activate the camera.
Position the document on a surface and hover the phone above it until the Camera app recognizes it: You can tell if the document is highlighted in blue. Most often, the app will take the photo automatically, but there’s also a shutter button in case it doesn’t grab your document right away.
Tap the Save button and it will place the new scan into your scans folder, where it will be visible everywhere you can access iCloud. From there, you can tap the document to rename it.
To scan multiple documents in sequence, arrange them in a stack so you can scan them in order one after the other.
After the camera shoots the first page, you’ll see a notation that says Ready next scan at the bottom, so just place the second page for it to grab in the same way. Keep doing that until you finish all scanning. Tap Save, and all your scanned pages will save to a single document. A badge will indicate how many pages are included.
You don’t have to worry about getting the scanning angle right because the app will automatically correct the view to flatten the scan. When you view the finished scans, they will be properly aligned with a high-quality representation of the contents.
After your scan is completed, there are even more options. Just tap on the page at the bottom left and use the trash can icon to delete a page completely or use the Retake button at the top right. This lets you fix a single page in a series without having to start a multiple page scan all over again. You can further crop or alter the edges of the document, use a filter, or rotate it so it looks exactly the way you want it.
Use the Notes app
The iPhone’s built-in Notes app has a special scanning feature that you can access whenever you create a new Notes document. Here’s how to do it.
Open a note or create a new note.
Tap the Camera icon to scan documents.
Place your document on a surface and hover your device camera over it.
If your device is in Auto mode, the app will automatically scan your document by highlighting it in yellow, and the app will apply flash depending on the lighting conditions.
Tap the filters control to fine-tune the scan for color, black and white, and grayscale.
You can manually capture a scan, by tapping the shutter button.
Drag the corners to adjust the scan to fit the page, if needed, or to scan only part of the page you want.
Tap Keep Scan.
Add more scans to the document if it’s a multiple page scan, and tap Save when you’re done.
When your scan is finished, you can still make filter, cropping, or rotating adjustments to it — or trash it.
Use Continuity Camera
Continuity Camera is a feature in MacOS and iOS that lets you launch the camera on your iPhone (or another iOS device) from your nearby Mac, and then transfer that photo or scan to an open Mac document. Continuity Camera operates natively with the Finder, Notes, Mail, Messages, TextEdit, and Keynote 8.2, Numbers 5.2, and Pages 7.2 or later. It’s available with MacOS Mohave and iOS 12 or later. Both your Mac and your device must have Wi-Fi and Bluetooth enabled and be signed into iCloud with the same Apple ID, using two-factor authentication. Here’s how to scan using the feature.
Open any of the supported apps on your Mac.
Control-click or right-click in the Mac document or window where you want your scan to appear, and choose Scan Documents, or in the Finder, choose Import from iPhone > Scan Documents, which opens the camera app on your iPhone or iPad.
Place your document in front of the camera lens on your iPhone or iPad, then wait for the scan to finish. If you need to manually capture a scan, tap or use one of the volume buttons.
Drag the corners to adjust the scan to fit the page, or to capture only the part of the document you want, and then tap Keep Scan.
Add additional scans to the document or tap Save when you’re done.

