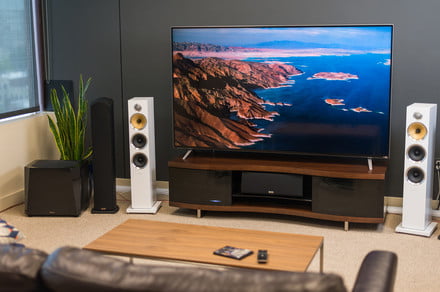
These days, even entry-level A/V receivers are likely to come with some form of auto-setup system that promises to make crucial speaker-related adjustments by simply plugging in a microphone and hitting the go button. Sounds appealing, right? Why would anyone want to spend an hour or more reading a manual, busting out a tape measure, and fiddling with a decibel meter when the auto-setup will do it for you, hassle-free, in a matter of minutes?
Why, indeed. Before the advent of the auto-setup routine, the frustration experienced by consumers while trying to set up their A/V equipment was a major cause for product returns. Auto-setup manages to mitigate that problem and now helps to keep A/V equipment in at buyers’ homes instead of in the return line.
Unfortunately, the measurement and crossover settings provided by these systems aren’t always accurate, and if you don’t know what to look for, you might never know it. Also, these auto-setup systems usually make EQ adjustments that don’t always improve sound quality. In fact, for those with high-quality speakers, using auto-setup can actually make your speakers sound less than their best. What’s the point of buying the best speakers you can afford if you’re not actually hearing what they’re capable of?
With a couple of tools and some guidance, even the most electronically-challenged of us can assure ourselves the very best sound quality by performing a manual speaker setup in their receiver. Here’s our plain language guide to manual speaker setup.
Step 1
Make sure you can see your receiver’s on-screen display (OSD) on your TV
Trying to set up your receiver using its tiny LCD display window is a hassle you don’t need. Instead, make sure that you can see your receiver’s display on your TV. Many modern receivers will put out the OSD via HDMI, but some older receivers require an older style of video connection. If you don’t see a menu pop up on your TV when you press the “menu” or “setup” button on your receiver’s remote control, make sure you have at least an RCA cable handy for connecting the receiver’s composite video (yellow RCA jack) output to one of the TV’s composite video inputs.
Onkyo OSD (image via)
Step 2
Know your receiver’s menu
You can spend time looking at the manual, sure, but getting a hands-on experience with your receiver’s menu by hunting and pecking through it with your remote control provides significant benefits. After browsing for a while, you’ll find that you remember where a lot of the menu options are because you actually navigated there before. Don’t worry if you don’t understand what some of the terms mean. We’ll explain some of the terms as we go on with our setup
Step 3
Place your speakers
We understand that sometimes the room in which your speakers live dictates where the speakers must be placed, and this can also vary based on the types of speakers you’re using. Some of us have entertainment centers with specific places for speakers, or we only have a handful of open spots in which to put a speaker. With that in mind, do the best you can to follow these basic speaker placement rules.
First, take a look at this simple speaker location graphic below:
Note that the center channel should be placed directly below or above your television. Since almost all dialogue comes from this speaker, it needs to be as close to the TV as possible to maintain the illusion that the voices are coming from the picture itself.
Try to place your left and right speakers as far away from each other as you are from your TV, creating an equilateral triangle between your head and the two speakers. It also helps if you place the top of the speaker at about 41 inches off the floor (average ear height).
Next, place your surround speakers above ear level (somewhere between 48 inches and 72 inches) and just behind your listening position. If you have surround back speakers (the sixth and seventh channels), place them in the same positions as the front speakers on the wall behind you.
For the subwoofer, avoid placing it flush with a corner of the room, or within another cabinet like an entertainment center. Subwoofers usually sound best placed a third of the way into the room from the side and front (or back) wall. It is OK to place a subwoofer in the back of the room, but make sure it is at least 3 feet away from your head. If you can’t place the subwoofer well into your room as suggested, keep at least 1 foot of distance between the sub and any given wall.
With your speakers placed and connected to your receiver, it’s time to set up the receiver to handle them properly. Start by accessing your receiver’s menu and selecting the “speaker setup” option. Most receivers offer the same basic adjustments. These include speaker distance, speaker size and crossover setting, and speaker level. We’ll go through each setting one at a time.

