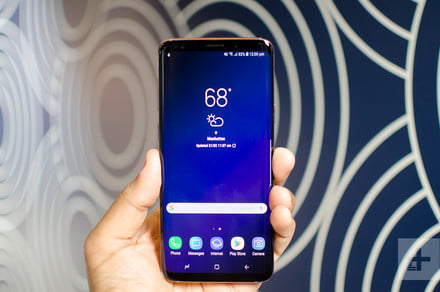
The Galaxy S9 and S9 Plus were recently released, but not everyone is a fan of the software powering each device. Samsung’s Experience UI — formerly known as TouchWiz — has improved with each passing update and smartphone release, however, there are still plenty of people who would prefer to work with something a bit more bare bones. Lucky for you, we’re going to show you how to make your S9 and S9 Plus look like the stock version of Android.
Choosing a stock launcher
First, you need to change the launcher. If you’re not familiar with the commonplace tool, it’s basically the app you use as your home screen. There are plenty of customized offerings to choose from in the Google Play Store, but if you’re trying to achieve that stock Android look, we recommend opting for the Pixel Launcher. To do so, navigate to this website on your mobile device, tap the blue Download APK button located near the bottom of the page, and save the installer to your device.
Once downloaded, pull down the notification — or navigate to the MyFiles app on your phone — and tap the APK, followed by Install. After you’ve successfully installed the launcher, tap your home button and select it from the resulting list. If you want to continually use the Pixel Launcher moving forward, go ahead and select Always in the bottom-right corner.
Opting for a messaging app
The next thing you’ll want to change is the messaging app. We personally prefer Google’s offering given it allows you to swipe away messages upon reading them, but most users will likely want to stick with something like Android Messages. To set it up, simply head to Google Play, install the app, and follow the on-screen prompts to set the app as your default messaging platform. We also suggest you pick up Google’s stock keyboard, the aptly titled Gboard, which will complement Android Messages — the installation/setup process is the same as that for the aforementioned messaging platform.
Setting Chrome as your default browser
Next, let’s ensure that Google Chrome is set as your default web browser. To do so, click the cog icon in the upper-right corner of your home screen, select Apps, and tap the three dots in the upper-right corner. Then, select Default apps from the resulting menu, tap Browser app, and check the bubble beside Chrome. Now, whenever you open a link or anything that requires your browser, your phone should automatically open the content in Chrome.
Choosing the appropriate dialer
Once you’ve set your default browser, it’s time to turn your attention to your dialer and contacts. There’s no stock version available for either (that we know of), but there is a decent clone in the Google Play Store called ExDialer. After you’ve downloaded and installed the app, open the Settings menu, select Apps, and tap the three dots in the upper-right corner. Next, select Default apps from the resulting menu, tap Calling app, and select ExDialer.
Selecting a calendar
Now, let’s set Google Calendar as your go-to calendar app. The app should already be on your device, but if it’s not, you can pick it up from the Google Play Store. Once installed, go to the Settings menu, select Apps, and tap Calendar. Afterward, tap Clear defaults, and the next time something requires you to input an event, choose Google Calendar from the host of available options, which will set it as your default calendar moving forward.
Implementing live wallpapers
Although not exactly “stock” Android, one of the better features Google decided to bring to its Pixel lineup are living wallpapers. These depict outer space and other exotic locales, and essentially function as animated backgrounds, adding a modern touch to your device. Adding them to your Galaxy S9 and S9 Plus, however, is a multi-step process.
David Cogen/The Unlockr
First, navigate to the Google Play Store and download the Wallpapers app. Then, navigate to the XDA website on your mobile device, download the AKP file that’s listed in the first post, and save the installer directly to your phone. Once downloaded, pull down the notification and tap Install, which should enable a section for live wallpapers within the Wallpapers app. Once that’s taken care of, simply choose your wallpaper of choice, tap Set wallpaper in the upper-right corner, and choose whether you’d like to set it as either your home screen or both your home screen and lock screen!
David Cogen — a regular contributor here at Digital Trends — runs TheUnlockr, a popular tech blog that focuses on tech news, tips and tricks, and the latest tech. You can also find him on Twitter discussing the latest tech trends.

